

Flickr CC by 2.0 - torbakhopper
Related Posts:
> See the "barriers and solutions" category of this blog.
Details:
1. Choose not to live on a hill, in a hilly area or have hills on your most common trips
- If you want to cycle for transport then minimising the number and size of hills you'll regularly need to ride over is vital. Yes, you may have to sacrifice the views but it makes a big difference to cycling rates. While hilly cities like Seattle and San Francisco have relatively high cycling rates, there are much fewer cyclists living at the top of the big hills. The secret to utility cycling in hilly cities is that most cyclists aren't riding up big hills daily:
I guess the point is that we Seattleites have become quite good at figuring out ways of avoiding those big hills that we’re so famous for.
Seattle Bike Blog: Elly Blue - How do Seattle cyclists deal with all those hills?
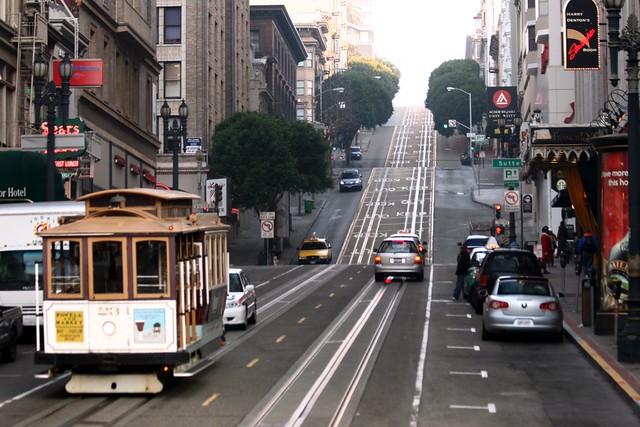
San Fancisco Street: Flckr CC by 2.0 - Prayitno
2. Choose regular destinations that involve less hills even if longer distances
- Apart from choosing not to live in a location where climbing a big hill daily is required you should also consider the most common trips you would like to cycle for and identify how they can be made as flat as possible. Choosing where to shop, eat and socialise based on reducing the hills is often worthwhile; the rides may be longer but will be much more pleasant. Changing work/study destinations is less feasible but hills and routes should be considered whenever the opportunity arises.
3. Use city cycling guides and local advice to find indirect routes that avoid hills
- In hilly cities, many intended city cycling routes are designed to avoid hills even if they are less direct. Often these routes aren't obvious or involve zig zags so new cyclists should look up local advice. For example, when I visited San Francisco I eventually "squiggled the wiggle" only after a local mentioned it to me. See: SF Gate: - Flat routes in San Francisco

- As these hill-avoiding routes are usually longer and less direct they may not show up in online mapping directions. Most cities have websites with suggested routes including for avoiding hills. E.g. SF Bike Coalition: Resources
- Remember that taking the flat, indirect way may seem inconvenient but it is often far more enjoyable and thus even significant extra distance doesn't matter so much. For example, in San Francisco riding around the water's edge (e.g. Embarcadero) is far more pleasant than sweating up and down hills.
4. Use Google Maps elevation profiles and terrain layer to select flatter routes
- Google Maps cycling directions now show elevation profiles for each route and there is also a terrain layer you can turn on to show the topography across the entire area. The elevation profile map shows the total climbing and descent. See: TechCrunch: Google Maps Adds Elevation Profiles To Bike Routes To Help You Avoid Those Steep Hills
- Below is a trip I mapped from where we stayed in San Francisco to Fort Mason. As you can see, Google Maps suggests bike routes based on bicycle infrastructure as well as the elevation profile. The Webster St and Steiner St routes involve an extra 30 feet of climbing and have steeper profiles. Google Maps defaulted to the Polk St route based on the easier climbing. Curiously it's calculations of travel time do not seem to take climbing into account as the Webster St route is listed as being 2 minutes quicker due apparently to the slightly shorter distance (0.1 miles). Clearly, cyclists with major hills on their routes should ignore the estimated travel times and even the directness and focus on the elevation profile.


- If you move your mouse over the elevation profile a marker will appear at the matching point on the route. This can be helpful in determining exactly where the major hills are:

- Google Maps also has a Terrain layer which enables you to see the topography of an entire area not just on a specific route. Unfortunately, you can't display the Terrain layer and Bicycling layer at the same time (hopefully this will be added soon) but you can switch between them in planning a route:

- Your own city may also have topography diagrams/websites that make it easier to memorise where the hills are and where the flatter paths between them are. E.g. For San Francisco, the below Data Pointed visualisation is very helpful:

5. Gradient is what really matters! So use bespoke cycling mapping sites/apps which provide gradient info, and integrate terrain and biking layers
- Bespoke cycling mapping websites which leverage Google Maps are the best way to combine all useful data and layers in planning flatter routes. Ride With GPS is one of the best ones and has a useful free plan as well as advanced features with paid plans. Below you can see not only the Bicycling and Terrain layers at the same time but also gradient combined with elevation.
- Steady manageable climbs are far preferable to steep gradients so this additional gradient information is very useful in choosing between routes with similar total elevation gain.

- A good example of how gradient is what really matters (not total elevation gained), is riding north-east to Northcote's High St (major activity area) via Fitzroy North. The main arterial cycling route north-south is the St Georges Rd bike path and, rather than mix it with traffic turning right in a bike-unfriendly intersection (Charles St), the obvious route to go east is Westbourne Grove. Unfortunately, Westbourne Grove has a 500m climb reaching gradients of 6.3%. At sustained gradients above 5% most transport cyclists will find cycling difficult and unenjoyable.


- Google Maps elevation profiles are little help in such cases as the total elevation to be gained is almost identical for all possible routes. However, what Google Maps doesn't show you is the difference in gradient. Using Ride With GPS, you can compare the different routes going east (Charles St, Clarke St and Westbourne Grove) and find the one with climbing that is flat enough and is still acceptable (convenience, safety). Below you can see that Clarke St proves to be a better alternative with a maximum gradient of 4.2%. A 2% lower maximum gradient makes this route much more bike friendly for transport cyclists.
Note: The gradient numbers in web apps like Ride With GPS are not highly accurate. But they generally have relative accuracy (e.g. within Ride With GPS, a street with a 6% gradient is steeper than one with 4% even if both gradients are a bit higher in reality). There is also some internal gradient inconsistency when routing, so always check the steepest parts of each route separately as specific sections.

- Another example of a web app that provides elevation-focused route overviews that indicate visually where the hills are is Flattest Route. It's niche is calculating the absolute flattest route between two points but it isn't that easy to refine routes and it doesn't optimally use bike-friendly routes like Google does. Below you can see the same San Francisco route mapped using Flattest Route. It is a nice plus to be able to see the colour-coded gradient sections of a route:

- The type of visual, street-based, gradient mapping approach with the most useful potential is Hill Mapper. It colour-codes all streets according to both gradient and whether uphill or downhill. Currently, it is only available for San Francisco, but there is nothing stopping developers in other cities, or a global web app, leveraging Google Maps Elevation Profile API to provide similar visualisations. I am anxiously looking forward to seeing such a web app for Australian cities; I think it will be incredibly useful.

See:
> CityLab: San Francisco Has Needed This for a Long Time: a 'Hill Mapper'
6. Avoid routes that take you downhill if you'll have to regain the elevation later
- When it comes to any cycling trip there is a simple logic to making any climbing easier: minimise the downhill sections en route and you will minimise the total amount of climbing required. For any trip where hills are an issue you should conscientiously eliminate feasible downhill sections (no matter how enjoyable) if you can otherwise avoid having to regain that elevation later. So even if you haven't plotted electronically the most efficient elevation and gradient route online, if riding somewhere and faced with the option of a downhill section (or you can see a sequence of down and up hills ahead) you may be best off taking the flatter alternative.
- As an example consider the alternative profiles for the trip from the Ferry Building to DragonEats in San Francisco. The downhill glide in the second route is nice but it isn't worth the extra 125 feet of climbing. So if you know your destination isn't up on a hill then there is a flatter way to get there. If you generally understand where the hills are and where the main, flat cycling routes are, it should be practical to avoid unnecessary up and down routes.


7. When riding in hilly areas plan your route carefully and check it while riding so you don't take a wrong turn! (particularly if the route is new). Consider backtracking if you haven't lost much elevation.
- Google Maps elevation profiles are a fantastic advantage and enable you to optimise your routes to eliminate as much climbing or steep gradients as is feasible. However, that won't help if you then don't remember the route while actually riding or take a wrong turn!
- On a ride in December 2014 to Cherryhill Orchards I'd planned to take the best route which, as shown below, is pretty flat for the last 2km if you turn from Beenak Rd to Wandin East Rd:

- Unfortunately, when actually riding this trip I missed this critical turn and stayed on Beenak Rd. This resulted in having to climb 500m up a very steep hill. We had to walk our bikes and it wasn't very enjoyable on a hot day at the end of a ride from Lilydale (17km).


- Normally, taking a wrong turn or going the alternate way is no big deal you can easily turn back or just get back on track. But when riding new routes in very hilly areas it is usually a big pitfall. This is particularly due to the likelihood that you'll have coasted downhill for some extent before faced with the big hill. You won't want to backtrack uphill the way you just came. You can see why, even had we known exactly how much better the Wandin East Rd route was, we wouldn't have wanted to backtrack to it - it would have involved climbing up the stretch we'd just coasted down.
- Nevertheless, if you do take a wrong turn in a hilly area the golden rule is still #6 (Avoid going downhill). If you haven't lost any elevation already then the decision to backtrack to the easier route is simply one of extra distance. If the hills are steep, most experienced cyclists will advise that extra distance is far preferable to climbing unnecessary, steep hills.
8. Use a bike with sufficient gears of the right range
- I ride a single speed bike in Melbourne as it is very flat and I can handle almost all hills on it. Yet, if I lived in Seattle I would definitely be riding a bike with gears as there are too many steep hills to try and avoid and I like being able to ride everywhere. I would most likely choose a 7 speed internal gear hub as this would provide enough range to enable me to climb any Seattle hill but keep the expense reasonable (an 11 speed would be overkill for me).
- In San Francisco I may try persisting with a single speed but would certainly change the ratio from the 46-17 I ride in Melbourne to 46-18 or 46-19. This would drop my top end pedalling speed around 5km/hr but would make steeper hills feasible to climb. Each individual needs to make a smart decision about gearing that suits their circumstances and preferences. These considerations are discussed here: When is a Single Speed bike most suitable and how to make the most of one
9. Consider a bike with electric assist (pedelec bike)
- Personally, I'm not that keen on full e-bikes as they limit many of the benefits of human-powered cycles (cost, simplicity, free exercise, light weight, low maintenance). However, bikes with adjustable electric assist (pedelecs) may help some people obtain the benefits of human-powered cycling by only kicking in when really required. You still have to pedal these bikes but when faced with hills or strong winds these bikes use electric assist to provide a boost.
- Older or less fit cyclists with steep hills, significant headwinds or long distances to tackle may find pedelec bikes enable them to cycle on their own steam most of the time but use the electric assist when they really need it.
10. Keep your bike, gear and loads as light as feasible
- A major reason why the traditional Dutch bike has been reinvented as lightweight utility bikes (e.g. Vanmoof bikes) is because many urban cyclists find they need the lightest, simplest bike to freely ride anywhere in the city, regardless of hills, wind and distance. See: The best existing design solutions for transport utility bicycles
- Apart from choosing a light bike try and minimise unnecessary attachments when not using them (e.g. racks) and the weight of your loads (e.g. bags, laptops, change of clothes etc.). One of the advantages of cycling for transport is the ready excuse you have for not carrying unnecessary objects.
11. Take your bike on public transport one way or up hills
- In many hilly cities public buses have bike racks at the front or back. In cities like San Francisco, cyclists who can't avoid certain climbs will use a bus to take their bike up the steep or long climbs. This isn't always reliable (racks can be full) or convenient but can help new cyclists before they build up their fitness or inclination to deal with hills.
- Other cyclists with commutes to work/study that are downhill one way and uphill the other may cycle the downhill route and put their bike on a train for most of the uphill route.
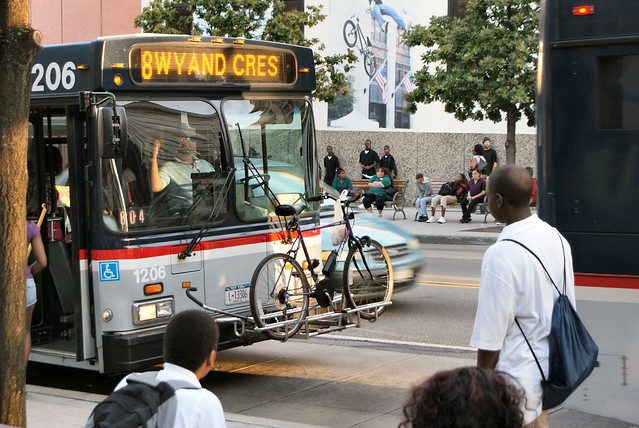
Flickr CC by 2.0 - Robert Torzynski
12. Walk your bike when necessary and it makes sense to use that route
- I ride everywhere in Melbourne on a single speed and have only encountered two hills that have forced me to get off and walk. The second was on a recent ride home from the airport when I decided to take Gaffney St to go east 3.3km as it was very direct and has a bike lane the whole way. I hadn't ridden this stretch before and found myself suddenly faced with a steep hill on a 22km ride at 1am carrying my 6kg backpack. (For details on the hill see: The Climbing Cyclist: O'Hea St - The steepest climb in Melbourne? and YouTube: Climbing O'Hea St)
- As you can see from the elevation profile below the hill only lasted 230m and the remaining 3km was dead flat, which isn't unusual in Melbourne. I had to walk only 100m and it was a nice breather from riding and a chance to stretch my back. When I next ride back from the airport I won't now try and avoid this hill. It's only short, walking 100m was fine and the route is so direct, safe and convenient there is no good reason to give it up.


- No matter how often you walk your bike or for what grade of hills it isn't something to be embarrassed about. For any hill you would struggle to climb (thus be going very slowly), it is often far more efficient and almost as quick to walk than struggle up by bike. And it is certainly more comfortable. So walking the bike is often the smarter choice.
13. Build up fitness and experience and you'll find them easier and may even find the rewards make them enjoyable
- Most cyclists faced with regularly climbing hills learn how best to tackle them (including their ideal speed) and also build up the muscles and stamina to make it much easier. Cycling regularly and not always dodging hills means you may lose weight as well and this also helps. However, there are also rewards for climbing hills. Tom Fucoloro from Seattle Bike Blog captures them nicely:
When I bike up a big hill, it’s hard and slow. Sometimes I get in a headspace where I can appreciate the small details around me and I really enjoy climbing. Other times (if I am tired, hungry or late, for example) I wish I had a bulldozer to just flatten the hill towering above me. But when I get to the top, the experience of relief and the reward of a spectacular view and exhilarating, easy downhill on the other side seems to erase all the negativity I had built up.
Just as biking up hills seems to be an impediment to cycling, biking down hills is among the greatest experiences a person can know. Moving swiftly without hardly using any muscles, letting the city just pull you along the roadway closer to your destination… There’s nothing like it. When I’m in the middle of gliding down a hill, every other way of getting around town just seems like nonsense.14. Improve and practice the techniques that suit your bike, circumstances and preferences
Seattle Bike Blog: Elly Blue - How do Seattle cyclists deal with all those hills?
- Depending on your bike different hill climbing techniques apply. For single speed bikes, you need to maximise your speed at the bottom of the hill and try and maintain maximum speed as you climb rather than preserve a steady tempo.
- For bikes with derailleur gears, especially if they don't shift perfectly, you may be best off shifting down to a gear you can spin up the hill at a steady rate rather than shifting multiple times while climbing the hill.
- For bikes with internal gear hubs (3-11 gears), which should shift easily and reliably, you may find that shifting gears down as you climb is more efficient.
- Ultimately you can only refine a technique that best suits your bike, capabilities, circumstances and preferences by climbing hills on your own common trips. You'll get to know your own hills and the best way for you to climb them. Remember that online hill climbing advice, especially for sports cyclists riding long trips, will often not suit urban cyclists riding short trips who want to minimise exertion and sweat.
15. Use cycling for trips limited to the flatter areas or one way such as via bike share
- Cycling doesn't have to be an all or nothing proposition. If hills are a major barrier to riding your own bike or around where you live there may still be other opportunities to use cycling for some types of trips in flatter areas.
- One of the simplest ways to incorporate low-barrier cycling into your life is to use bike share. Bike share is designed for use by regular "non-cyclists" and typically concentrates on short trips in the flattest parts of the city or designs its bikes to be suitable for climbing. Where hills are unavoidable, bike share is often used one way and the bike share system then shifts the bikes back up the hills at the end of each day:
And when Capitol Hill residents bomb downtown to work and then take the bus home in the evening? The Pronto! operations team will circulate through the system and redistribute bikes so they don’t all end up in certain neighborhoods on certain docks.- Once having experienced the advantages of cycling and found ways to handle some hills, you may then choose to extend your usage of cycling by getting your own bike and using it for more trips.
Crosscut: Is Seattle too hilly for bikeshare?
See:
> Crosscut: Is Seattle too hilly for bikeshare?
> CityLab: The Challenge of Selling Bike-Share in a Hilly City
Further Info:
Seattle Bike Blog: Elly Blue - How do Seattle cyclists deal with all those hills?
Taking The Lane: How Seattle riders deal with hills
Crosscut: Is Seattle too hilly for bikeshare?
Gizmodo: Why Don't More Cities Have E-Bike Shares?
WickWerks: Should I ride a Single Front Chainring? A Double? A Triple?
Flat Cyclist: Climb = what flat distance?
YouTube
Dirty Dozen - It's Pittsburgh & A Lot of Other Stuff
Elevation, Gradient and Topography Web Apps
Cycle Route
Velo Routes
> Hill Grade Calculator


